


How to Prime Replacement Coils Without Dry Hits
A fresh coil should taste clean, not scorched after three puffs. Knowing how to prime replacement coils is the small but essential step that prevents avoidable dry hits, protects stock from unnecessary returns and gives customers the flavour their e-liquid is meant to deliver. Whether it is a sub-ohm tank, MTL kit or refillable pod, the goal is the same: give the cotton enough time to fully absorb e-liquid before heat reaches it.
For adult vapers and trade customers alike, correct priming makes a real difference to coil life, flavour consistency and repeat purchases. It takes a few minutes, costs nothing and is worth doing every time a compatible replacement coil is fitted.
Why replacement coils need priming
Inside most replaceable coils is a cotton wick sitting against a heating element. When the device is fired, that element heats quickly. If the cotton is still dry in even one area, it can singe almost instantly. Once cotton is burnt, the taste rarely recovers - replacing the coil is normally the only fix.
Priming saturates the wick before the first fire. It also reduces the chance of a harsh hit while the coil settles in. This matters particularly with thicker, higher-VG e-liquids, which move through cotton more slowly than thinner liquids, and with higher-powered coils that use more e-liquid per puff.
Do not confuse a new coil’s slight “fresh” taste with a burnt one. A new coil may need a handful of gentle puffs to bed in, but it should not taste charred, bitter or persistently harsh. If it does, stop using it rather than turning up the power.
Check the coil and e-liquid first
Before fitting anything, make sure the coil is designed for the exact tank, pod or kit in hand. Similar-looking coils are not always interchangeable. Check the product name, resistance and recommended wattage range printed on the coil or packaging. For retailers, keeping compatible coils grouped clearly with their matching kits helps avoid a common and costly mistake at the counter.
Then consider the liquid. Low-resistance, direct-to-lung coils generally suit thicker, high-VG e-liquids and more power. Higher-resistance mouth-to-lung coils often work better with 50/50 e-liquid or nicotine salts, depending on the manufacturer’s guidance. Using very thick liquid in a small-wicking MTL coil can lead to dry hits; using very thin liquid in a large sub-ohm coil can cause flooding or leaks.
Some refillable pod systems use a built-in coil. In that case, the entire pod is replaced once the coil reaches the end of its life. You cannot remove and drip-prime the coil, but you should still fill the pod and allow the wick to saturate before vaping.
How to prime replacement coils step by step
The process is straightforward, but rushing it is where problems begin.
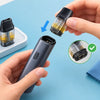
1. Remove the old coil and fit the new one securely. Switch the device off first where possible. Follow the tank or pod instructions, making sure seals are seated correctly and the coil is pushed or screwed fully into place. A loose coil can cause leaking, poor connection or a “no atomiser” message.
2. Add a small amount of e-liquid to exposed cotton ports. If the coil has visible white cotton through its side openings, place a few drops of compatible e-liquid directly onto each opening. One or two drops down the centre is usually enough if the central chimney is clearly accessible. The aim is to dampen the wick, not flood the coil. Do not force liquid into every gap.
3. Install the coil, then fill the tank or pod. Keep e-liquid out of the centre airflow tube when filling a tank. Overfilling can create gurgling and leakage, while filling through the chimney can send liquid straight into the airflow path. Close the fill port firmly once finished.
4. Leave the device upright for at least five to ten minutes. This is the part many people skip. The liquid needs time to travel through the wick evenly. Give high-VG liquids, larger coils and colder rooms a little longer - around 10 to 15 minutes is sensible. With a new built-in-coil pod, follow the same waiting period after filling.
5. Start below the recommended wattage range. For adjustable kits, begin at the low end of the coil’s stated range and take two or three short, gentle puffs. Increase the wattage gradually over the next few puffs until the vape feels right. There is no prize for starting at maximum power, and doing so can overwhelm a fresh wick.
If the kit is draw-activated or has fixed power, the wait time does most of the work. Take gentle draws at first and avoid repeated back-to-back puffs while the wick is still settling.
Get the first few puffs right
Even a properly primed coil benefits from a calm start. Take shorter puffs than usual for the first five to ten draws, leaving a little time between each one. This lets fresh e-liquid keep reaching the cotton as it begins to heat and vapourise.
Wattage should always stay within the manufacturer’s printed range. Going too low can produce weak vapour and excess liquid in the chamber; going too high can burn the wick or shorten its lifespan. The best setting depends on the coil resistance, airflow, e-liquid ratio and the user’s preferred draw, so the middle of the recommended range is often a sensible place to settle after break-in.
Keep the tank or pod topped up too. A nearly empty tank may leave the wick ports uncovered, especially when the device is tilted. That can create a dry hit even when the coil was primed correctly at the start.
Common priming mistakes and what they mean
A burnt taste immediately after fitting a new coil usually points to insufficient saturation, too much power too soon, or an e-liquid that is too thick for the coil. Stop firing the device straight away. If the cotton has only just started to dry, leaving the tank to stand for longer may help. If the burnt taste remains, the wick is likely damaged.
Gurgling, spitback or leaking after priming usually means too much liquid has entered the central airflow tube or the coil is not seated properly. Remove excess liquid from the mouthpiece and airflow area with a tissue, check the coil and seals, then use gentle puffs at a suitable wattage. Avoid adding extra drops into the centre of a coil unless the manufacturer specifically instructs it.
A weak flavour result is not always a faulty coil. Check the wattage, airflow setting and e-liquid choice first. Very sweet liquids can also darken and clog coils more quickly, while constant chain vaping does not give the wick enough time to resaturate. Coil lifespan varies, but a sudden flavour drop, persistent burnt taste or noticeably reduced vapour are practical signs it is time for a replacement.
A useful check for trade counters and repeat buyers
For shops selling starter kits, tanks and multipacks of coils, priming guidance is one of the quickest ways to improve the customer’s first experience. Ask which device they have, confirm the coil resistance and check what type of e-liquid they are using. That short conversation can prevent an incompatible purchase and reduce the assumption that every early burnt coil is defective.
It also pays to keep fast-moving coil families, replacement pods and suitable e-liquids available together. Customers often need a coil immediately, not after their current one has already burnt out. Clear compatibility information and dependable replenishment make that decision quicker for both staff and regular adult vapers.
A replacement coil is a consumable, but it should not be disposable after a few pulls. Give the wick time, start gently and match the liquid to the coil. Those few extra minutes before the first puff are usually the difference between clean flavour and a coil that is finished before its time.